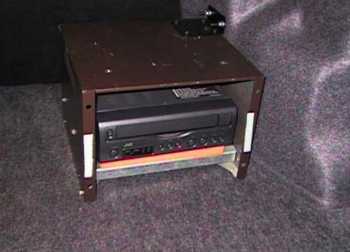
I started this project by mounting the VCR in the trunk. I chose to go with the JVC KZ-V10 12v VCR, for it is one of the units used by police and it is compact. I wasn't comfortable with mounting the VCR directly to the car. I found an old Radio Shack phone splitter box at a surplus store and gutted it. Yes, I do plan on painting it in the future. The VCR is mounted on springs to the case. This should be enough shock padding.

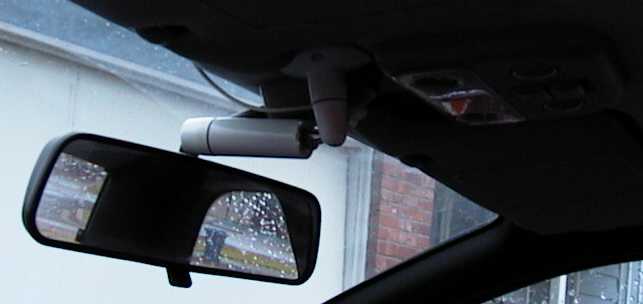
My next action was to run three wire RCA cable from the center rear view mirror to the center console, the one under the driver right elbow. I did not remove the head liner. I found it was easier to just shove the wire under it next to the window. I did have to remove the pillar plastics. The molded plastics had more than enough room for the wire. I ran the wire down the pillar and into the dash. I ran the wire though the dash, by the lighter and into the center console box. The RCA cable will carry the power and the video signals. I chose three wire because I might install an IR camera in the future. The camera mounting came out better than I though. I never thought that the pedistle would hold.
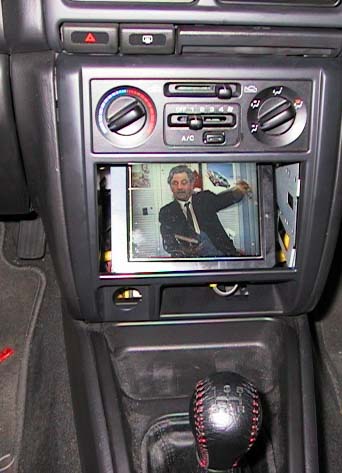
Installing the screen turned out to be much easier than I had thought. The screen needs 12v and a video source. Since I don't smoke and have no use for the lighter, I removed it. I unplugged the power from the lighter and plugged it into the screen. I then ran a single RCA wire from the center console to the screen. I reused the mounting holes from the radio mount brackets to mount the screen. The screen was still to tall for the radio and cup slot. It also is easiest to view the screen when leaned back, so I mounted it at about a 15 degree angle. In the picture on the right you can see how much room I needed to give the screen to learn back.

I reassemble all of the cosmetic plastics. This car is so great to work
on. Everything just snaps in and out. Below you can see the screen in action.
Bonus points if you can name the movie. I still have to finish making the
plastic around the screen. I also need to lower it some. As you see it
below the screen is resting on the ash tray mounts. I haven't decided if
I'm going to leave it the way it is or cut the molding.
Postmortem:
I should have used higher quality RCA cable. One cable broke on installation.
Telling the girlfriend at 4pm that I could be finished by 6pm and still
go out was a bad idea. Then not calling till 2:30am... I plead male.